PlayStation 3 Controller Support
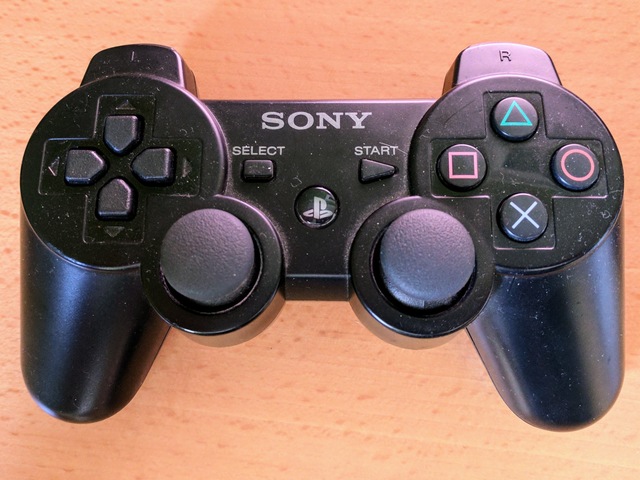
DualShock 3 Controller
Note
If you are starting from scratch and don’t have any PS3 controllers I recommend using the PS4 controller instead. It’s a better piece of hardware, and pairing is considerably simpler. The most recent XBox One controllers are also an option. This guide therefore is largely for those who have existing controllers and want to make use of them.
Note
If you are using a new (5.49 onwards) version of BlueZ with the SixAxis plugin installed you can ignore most of this guide and skip to the ‘pairing with new BlueZ’ section.
Newer BlueZ versions
Most of the information on this page applies only to older bluetooth versions. If you have a newer version of BlueZ and have also compiled or otherwise installed the sixaxis plugin, the pairing process is much simpler. Tested with a custom build of BlueZ 5.49.
Run bluetoothctl as a normal user and enable to default agent
Connect your PS3 controller with a mini-USB cable and press the PS button
Answer ‘yes’ at the prompt to authorise
Disconnect your PS3 controller and press the PS button to turn it on. It should now connect over bluetooth
A note on pairing
One of the reasons the SixAxis isn’t as easy as it could be to use is how pairing works. Normal bluetooth devices will establish a link between the device and the host once, then the host can initiate connection using this previously stored information. In the case of the SixAxis, it’s actually the controller that initiates the process, so we have to do some setup beforehand. We need to tell the controller to which bluetooth host it should attempt to connect, and we need to tell the host (the Pi) that it should allow the controller’s connection.
Hardware
This guide assumes you’re using a Raspberry Pi (I’m using a Pi 2, but there’s no reason this wouldn’t work with older ones). You’ll also need a USB bluetooth dongle and, obviously, a SixAxis controller. I’ve only tried this with genuine Sony ones, many of the cheaper ones you’ll find online are clones, they should work but YMMV (experimentation suggests that you’ll be extremely lucky to make one of the clones work, go for the genuine ones!)
Bluetooth dongles
Some people are finding this guide does not work. I suspect this is down to the bluetooth dongle, having eliminated everything else in the process. The one I’m using is an Asus USB-BT400, it’s tiny and supports all the current Bluetooth standards. If you get this to work with a different dongle can you let me know on twitter at @approx_eng_ and I’ll add it to this list:
Asus USB-BT400
Pi3 built-in bluetooth
Software
Note
This is assuming you’re starting from a clean installation of the Jessie based Raspbian. Other
distributions may need varying combinations of dev libraries etc. For testing I was using the minimal installation with
filename 2015-11-21-raspbian-jessie-lite.zip but these instructions should apply to any recent version. As always,
it’s not a bad idea to run sudo apt-get update and sudo apt-get upgrade to get any changes to packages since
your distribution was built.
You’ll need to install some packages on your Pi first, and enable the bluetooth services:
pi@raspberrypi ~ $ sudo apt-get install bluetooth libbluetooth3 libusb-dev
pi@raspberrypi ~ $ sudo systemctl enable bluetooth.service
You also need to add the default user to the bluetooth group:
pi@raspberrypi ~ $ sudo usermod -G bluetooth -a pi
You must now power cycle your Pi. Do not just reboot, actually shut down, pull the power, wait a few seconds and reconnect. This may be overkill, but it’s been the best way I’ve found to consistently have the next steps succeed.
Pairing
Get and build the command line pairing tool:
pi@raspberrypi ~ $ wget http://www.pabr.org/sixlinux/sixpair.c
pi@raspberrypi ~ $ gcc -o sixpair sixpair.c -lusb
Firstly we need to tell the controller the address of the bluetooth dongle. To do this you need to connect the controller to your Pi with a mini-USB cable. Also make sure your Pi is powered from an external supply - the extra power needed when you connect the controllers can be too much for a laptop USB socket and you’ll get random errors or the process won’t work at all. The ‘sixpair’ command, run as root, updates the controller’s bluetooth master address:
pi@raspberrypi ~ $ sudo ./sixpair
Current Bluetooth master: 5c:f3:70:66:5c:e2
Setting master bd_addr to 5c:f3:70:66:5c:e2
You should see a message indicating that the bluetooth master address on the controller has been changed (you can specify the address to which it should change, the default with no arguments is to use the first installed bluetooth adapter, which is what you want unless for some reason you’ve got more than one plugged in). The controller will now attempt to connect to your bluetooth dongle when you press the PS button (don’t do this just yet, it won’t work). The example above shows that no change has been made, as this particular controller had been paired with the dongle before, but you should see two different addresses - the first is the address the controller was trusting, the second is the one it now trusts.
Next we need to configure the bluetooth software on the Pi to accept connections from the controller.
Disconnect your controller from the USB port, and run the ‘bluetoothctl’ command as a regular user (you don’t need to be root for this):
pi@raspberrypi ~ $ bluetoothctl
[NEW] Controller 5C:F3:70:66:5C:E2 raspberrypi [default]
... (other messages may appear here if you have other bluetooth hardware)
Now re-connect your controller with the mini-USB cable. You should see messages in the terminal indicating that something has connected (but don’t worry if you don’t, as long as something useful appears in the next step!)
Type ‘devices’ in the terminal. You will see a list of possible devices, including at least your SixAxis controller. You need to take note of the MAC address of the controller for the next step:
[bluetooth]# devices
Device 60:38:0E:CC:OC:E3 PLAYSTATION(R)3 Controller
... (other devices may appear here)
Type ‘agent on’ and then ‘trust MAC’, replacing MAC with the MAC address you noted in the previous step (they won’t be the same as mine!). Quit the tool once you’re done.
[bluetooth]# agent on
Agent registered
[bluetooth]# trust 60:38:0E:CC:0C:E3
[CHG] Device 60:38:0E:CC:0C:E3 Trusted: yes
Changing 60:38:0E:CC:0C:E3 trust succeeded
[bluetooth]# quit
Agent unregistered
[DEL] Controller 5C:F3:70:66:5C:E2
Disconnect your controller, you should now be able to connect wirelessly. To check this, first list everything in /dev/input:
pi@raspberrypi ~ $ ls /dev/input
by-id  by-path  event0  event1  event2  event3  event5  mice  mouse0
Now press the PS button, the lights on the front of the controller should flash for a couple of seconds then stop, leaving a single light on. If you now look again at the contents of /dev/input you should see a new device, probably called something like ‘js0’:
pi@raspberrypi ~ $ ls /dev/input
by-id    event0  event2  event4  js0   mouse0
by-path  event1  event3  event5  mice
If a new device has appeared here then congratulations, you have successfully paired your dongle and SixAxis controller. This will persist across reboots, so from now on you can just connect by pressing the PS button on the controller. Pressing and holding this button will shut the controller down - at the moment there’s no timeout so be sure to turn the controller off when you’re not going to be using it for a while.
- class approxeng.input.dualshock3.DualShock3(dead_zone=0.05, hot_zone=0.0, **kwargs)[source]
Driver for the Sony PlayStation 3 controller, the DualShock3
- __init__(dead_zone=0.05, hot_zone=0.0, **kwargs)[source]
Discover and initialise a PS3 SixAxis controller connected to this computer.
- Parameters:
dead_zone (float) – Used to set the dead zone for each
approxeng.input.CentredAxisin the controller.hot_zone (float) – Used to set the hot zone for each
approxeng.input.CentredAxisin the controller.